Constance Pelkey Designs

Showing posts with label sanding. Show all posts

Monday, July 14, 2008

Painting the bathroom.

Here's a few shots of my work from today. Tomorrow morning I work until 10 and then it's up to Mom's. She's been feeling poorly, the humidity is really kicking her ass this summer and she's been having bronchial troubles.

I work again Wednesday morning until 10 and then I'll work some more on the walls in here in the afternoon.


The bathroom - looking in the door, after texturing, before painting.


Standing at the toilet, looking out into the dining room.


Cutting in the sky blue ceiling.


More ceiling and some of the unfinished shower surround.


The sky is blue... and still wet.


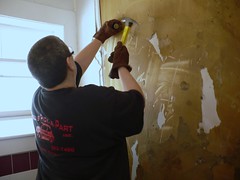
After cutting in, rolling and then touching up the ceiling - twice! - it's acoustic tiles! - AKK!! - my arms were waaay too tired to do any detail work, so I just rolled out some of the fields on the walls. My shoulder is doing soooooo well, but working over head is VERY tiring, still!!


Looking back out to the dining room.


Close up of the texturing. Before you judge, be certain to wait on the final effect. The color looks like baby poop smeared on the walls at this point! There will be a darker color glaze wiped on and then off for an antiquing faux effect.


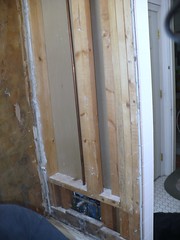
Here's the ugly tile surfaces (in the pictures above and below this text) that will be covered with polymer clay tiles of suns and Saguaro cactus and then 2 part epoxy resin will be poured over them to make them water proof.


All the trim work and cabinets will remain the lighter color with no faux-ing on them. I'll also cover the door knobs and drawer pulls in polymer clay to match the colors.


Copyright © 2008 by Constance Pelkey.

This bloggy feed is for personal, non-commercial use only. If you are not reading this content in a news reader or on a website related to Constance Pelkey Designs, this site is in violation of copyright!
Thanks!! Connie

Tuesday, June 24, 2008

Bathroom redo!

We started this project last winter, right before we went to Key West.

Many things delayed the finish of this project. My shoulder pain and ensuing surgery being #1! The painting of the new bedroom and dressing room upstairs being #2!


Nancy tearing down the broken old shower surround.


The bare studs.


Texturing of the walls... After this texture has dried then I need to sand down the super rough spots and then wipe down, wipe down, wipe down all that dust that will inevitably happen!

Of course, more pics to come!


Copyright © 2008 by Constance Pelkey.

This bloggy feed is for personal, non-commercial use only. If you are not reading this content in a news reader or on a website related to Constance Pelkey Designs, this site is in violation of copyright!
Thanks!! Connie

Thursday, May 08, 2008

faux-pal and fauxquoise


faux-pal and fauxquoise
Originally uploaded by connie_clays
Or Faux Opal and Faux Turquoise. Here is my mornings work of my versions of faux opal and turquoise I made.

This is taken just as they are going in to the oven. They still need to be baked, iced, tumbled, acrylic painted , buffed, drilled, strung, PMC bezeled, finished and foto'ed.

Just thought I'd share my works in progress today. *G*

This afternoon I plan on taking more finished work photo's out on the deck. Yesterday I got all of 3 finished and my batteries died! Simply MUST get more rechargeables!! Arrggghh!!

Wednesday, May 07, 2008

New Pictures

Well, this afternoon I plan on bringing all my finished salable items out onto the loverly, warm and sunny back deck (of Ice Out fame). Then I'll take brand new pictures of them all with the new camera we got for Xmas, I've been diligently working on getting better and better at taking pictures with it! I'll soon be in the process of resetting my Etsy store and my PayPal store (in the sidebar) and setting up my new eCrater store, which happens to be powered by Google!


So... yay for bright sunny days!

Connie

~ Life's too short to use cheap beads! ~


Wednesday, April 30, 2008

Complex Cane Swap

I joined Linda Weeks geometric cane swap a few months back and this was the results of my swap bootee! I think they came out rather nice. I have yet to complete them, but they are all sanded and shined up nicely with those lovely 3M polishing papers that Jana Roberts Benzon turned me on to!! I have been polishing these over the last few days, holding one arm still and not using the muscles in that arm was a challenge!! Self to shoulder: heal quickly!!

P1010419

A couple hidden compartment key chains from Larry over at Boston Clayworks. Some pendant and watch face components from Lisa over at Covered in Clay. And an empty Altoids tin.

P1010423

The pendants which will soon have wire wrapped bead dangles added to the loops and then strung, prolly on some leather.

P1010421

The empty watch face component. I didn't think I cared for this cane, until I put it together and placed it over a dome of clay pressed into the face opening. There's a rather large crack that I have to figure out how to repair... any thoughts?? I hope I can effect a good repair because I really like this and can easily see it strung on multiple strands of seed beads - perhaps in blues??

P1010418

I like the two key chains also; the retro one is my favorite.

P1010417

The lower right cab will be wire wrapped (there's two channels running through the silver bezel frame) onto silver wire with complimenting seed beads and then strung on silver chain with more seed bead wrapped components - prolly choker length.

The three silver triangle bezels will prolly be strung simply on some colored leather cording.


Connie

~ Life's too short to use cheap beads! ~


Thursday, March 27, 2008

Finishing


caned hollow lentil
Originally uploaded by connie_clays


I've been focusing my efforts on refining my finishing techniques. I avoided finishing before this, but I'm feeling I need to take my work up a notch. So, I am now dry tumbling my PC pieces in pebbles, then fine sand for about 10 hours per each medium. After rinsing off the fine sand remnants, I quickly hand sand items from rough to fine grit with 3M sanding blocks. Then, after a final "polishing" with the new 3M polishing papers, I give them a quick buff with my hand made felt wheel on my converted bench top grinder. Seems to be working well!

Connie

~ Life's too short to use cheap beads! ~